Table of Content
So, to get started with our Home Automation system using Arduino, the first thing to do is download and install Arduino IDE fromHere. Here I will be connecting LED strips that work on 12 V So, I will be connecting a 12 V DC adapter. SSR is basically an electronic switch that switches on & off when a small externalvoltageis applied across its control terminals. 1Sheeld board into the Operating mode to communicate with your smartphone 1Sheeld app. If you noticed, the IR code for on/off switch has negative numbers.

And the Climaduino Controller uses a Raspberry Pi Model B with a USB WiFi adapter and a power brick for the power supply. You’ll be using a mobile-optimized web interface to control the thermostat settings. We are showing voice control home automation system to control appliances with own voice command an Android app IoTBoys.
Step 8: Port Forwarding
Ian Buckley is a freelance journalist, musician, performer and video producer living in Berlin, Germany. When he's not writing or on stage, he's tinkering with DIY electronics or code in the hope of becoming a mad scientist. For a quick introductory project using Bluetooth with Arduino, check out the following video from Tinkernut Labs. Forget PlayStation 4 and Xbox One, Real gamers build their own gaming consoles. If you love Retro games as much as we do, these Raspberry Pi & Arduino projects are definitely worth checking out. A humidifier can be quite useful, especially if you live in a particularly dry area.

You can see temperature in your home and other information from all over the world! I built it because I wanted to make my own smart home and control it. If you want, you can make your own smart home, all you need is parts and a lot of desire. DIY smart home automation projects are more popular than ever. This compatibility opens up massive options for DIY automation.
Step 6: Application Configuration
Download it from the Playstore on your Android phone and install the app. Understanding your own voice commands with Google Home only works with the English language. So set the language to English via settings / more settings / assistant / languages and then choose English . This MUO project uses a magnetic sensor to detect when a door opens and uses that information to start a custom song.
Blynksolves this problem by allowing control of all of your IoT devices within a single app. The service will enable users to take advantage of common DIY single-board microcontrollers, like the Raspberry Pi or Arduino, to push IoT data to the Blynk smartphone app. Once you start playing with DIY home automation, you start to see ideas everywhere. Using an Arduino or similar board is a fantastic way to get started. Arduino is only one side of the story however, as the Raspberry Pi is equally well suited for these kind of projects, and getting started controlling relays can be pretty easy.
Introduction: Smart Home With Arduino
The Gassist Pi setup has all of the same features as a regular Google Home—along with an ever-increasing array of other integrations. That said, some elements of home automation do not come cheap. But, with a DIY attitude and some inexpensive components, you can build your own smart home on a shoestring budget. Bluetooth is another common way to remotely communicate with your Arduino. In most cases you will need to get a Bluetooth shield in order to connect, and at under $3, they are a cheap option if you want to take this route. The Arduino in these examples controls our chosen appliance when triggered.
Blynk gives you quick and easy control of any Wi-Fi-enabled microcontroller and is a robust tool in the arsenal of many home automation hobbyists. As one of the most experienced PCB manufacturers in China, they pride themselves to be our best business partners as well as good friends in every aspect of your PCB needs. To make the experience fit your profile, pick a username and tell us what interests you. A security system using the Arduino Bluetooth Camera and ultrasonic to detect that a stranger has entered house and capture a photo of him. "Hi, There is a dangerous level of gas in your home! Please check your dashboard."
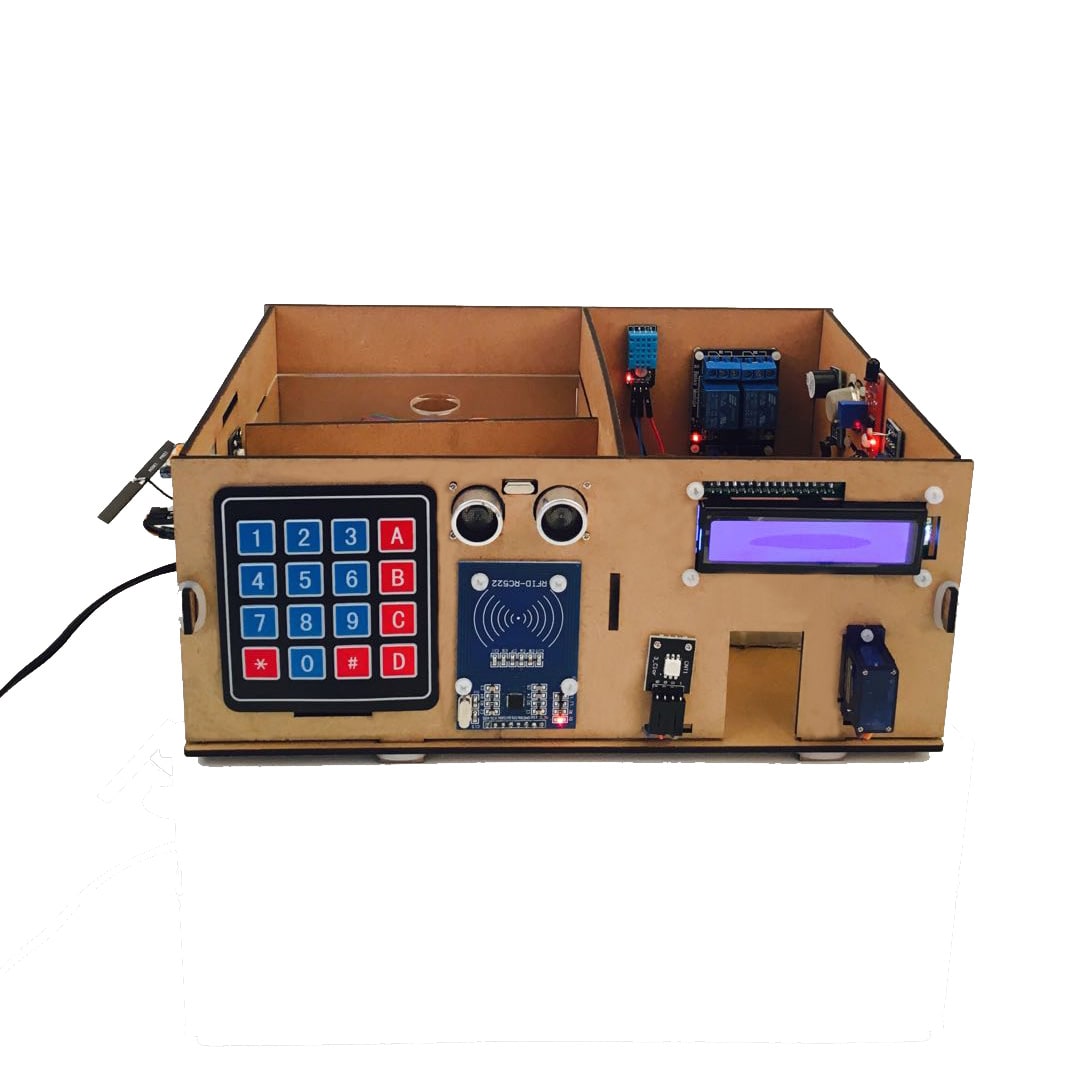
Meet the Climaduino, an Arduino-based DIY thermostat that you can build at almost half the price of a Nest. An advanced home automation project with Arduino Uno and Bluetooth sensor to control it, anytime from anywhere. Control and monitor the home environment using Android app with advanced features such as voice command, scheduling, home preparing itself. Build one yourself by following this step by step guide and control your home. This project is sponsored byPCBGoGo.PCBGoGo is a PCB manufacturer specializing in PCB prototyping, low-volume production, and neat and tidy PCB Assembly.
Arduino Halloween robot that can be controlled manually and autonomously. It can play terrifying Halloween soundtracks with light changing. IoT Temperature sensor tutorial which will show you how to add a sensor reading widget and use it with the app. You have to add these attached code files [dht.cpp - dht.h - TimerOne.cpp - TimerOne.h] in the same folder of the Arduino code file as they are libraries I used in the Arduino code. Copy these arrays to replace them with those in the project code.
You might have seen similar RFID-controlled locks at your workplace, but this DIY IoT project allows you to bring that technology home. Now that you understand the basics of making DIY smart home appliances, lets look at some examples. In the example above, the Arduino reads the input voltage from the button using digitalRead. When the voltage is read as HIGH, it turns the LED on by using digitalWrite to set its pin to HIGH.
3 One or more 5 Volt switching relays, one for each lamp you want to control. These projects constitute only a small cross-section of what is possible for adventurous smart home DIYers. Once you get started you'll find that there are almost no limits to what you can automate using barebones components.
Then choose Adafruit and click on “send data to adafruit IO”. The ON-OFF feed appears in the first field and then enter the desired code in the second field (here as an example “all-on”). When you click refresh in your app or in browser Arduino sends data to smartphone/browser. Application gets source code from each page ( /tempin, /tempout, /rain, /window, /alarm) and displays it on your phone. Sticking with the security theme, why not set up a DIY security camera in your home?
All you need for this project is an Arduino Yún microcontroller, an infrared receiver, a USB power adapter and a couple of breadboards. After finishing setup, the controls can be accessed via a simple web interface that you can access through any web browser. The Internets are exploding with chatter about the Internet of Things and how it’s helping to improve our homes. If you’re ready to join the early adoption of smart home tech, we’ve run down a few items that might be worthy weekend projects. Arduino-based smart home hub allows you to control your devices remotely from outside and monitor your home environment from your phone.


No comments:
Post a Comment